Monday, 18 May 2009

Remove Haloscan from Blogger Template

This is kind of awful to use Haloscan, my main problem was that i could never find that on which post the comment is posted. I chose to switch back to Blogger Comment system, which is not the best but atleast better than Haloscan, after reverting back to blogger comments, you can even add any else comment system, like Intense Debate.

It is a very easy job to remove haloscan, i tried too many websites, their words to do, but most of them make it very complex.
Go to your blogger's Layout Tab, then "Edit HTML"
Please first read the whole Procedure before starting
  1. Make a Backup: First, and the most important, download your template first in case you do a mess accidently.
  2. Identify Haloscan codes: Using firefox Ctrl+F shortcut find word Haloscan, for ease it'll be better if you highlight them. There are three parts. NOTE: Please Tick "Expand Widget Templates" before doing this step.
  3. Remove The Code: Now remove the Haloscan Code, try to just delete the real code, let the 'comments'(HTML Comments) remain untouch, like this.Remember Don't delete all parts, let the Part 3 remain as it is.  You can even skip this step, so you can replace the code below
  4. Add Blogger Code
  5. In between Haloscan (part 1) add this code:

    <a class='comment-link' expr:href='data:post.addCommentUrl' expr:onclick='data:post.addCommentOnclick'><b:if cond='data:post.numComments == 1'>1 <data:top.commentLabel/><b:else/><data:post.numComments/> <data:top.commentLabelPlural/><br /> </b:if></a>

  6. In between Haloscan (Part 2)

    <h4> <b:if cond='data:post.numComments == 1'><br /> 1 <data:commentLabel/>:<br /> <b:else/><br /> <data:post.numComments/> <data:commentLabelPlural/>:<br /> </b:if><br /> </h4><br /> <b:if cond='data:post.commentPagingRequired'><br /> <span class='paging-control-container'><br /> <a expr:class='data:post.oldLinkClass' expr:href='data:post.oldestLinkUrl'><data:post.oldestLinkText/></a><br />  <br /> <a expr:class='data:post.oldLinkClass' expr:href='data:post.olderLinkUrl'><data:post.olderLinkText/></a><br />  <br /> <data:post.commentRangeText/><br />  <br /> <a expr:class='data:post.newLinkClass' expr:href='data:post.newerLinkUrl'><data:post.newerLinkText/></a><br />  <br /> <a expr:class='data:post.newLinkClass' expr:href='data:post.newestLinkUrl'><data:post.newestLinkText/></a><br /> </span><br /> </b:if><br /> <br /> <dl id='comments-block'> <b:loop values='data:post.comments' var='comment'> <dt expr:class='"comment-author " + data:comment.authorClass' expr:id='data:comment.anchorName'><br /> <b:if cond='data:comment.favicon'><br /> <img expr:src='data:comment.favicon' height='16px' style='margin-bottom:-2px;' width='16px'/><br /> </b:if><br /> <a expr:name='data:comment.anchorName'/><br /> <b:if cond='data:comment.authorUrl'><br /> <a expr:href='data:comment.authorUrl' rel='nofollow'><data:comment.author/></a><br /> <b:else/><br /> <data:comment.author/><br /> </b:if><br /> <data:commentPostedByMsg/><br /> </dt> <dd class='comment-body'> <b:if cond='data:comment.isDeleted'> <span class='deleted-comment'><data:comment.body/></span> <b:else/> <p><data:comment.body/></p> </b:if> </dd> <dd class='comment-footer'> <span class='comment-timestamp'> <a expr:href='data:comment.url' title='comment permalink'> <data:comment.timestamp/> </a> <b:include data='comment' name='commentDeleteIcon'/> </span> </dd> </b:loop> </dl><br /> <b:if cond='data:post.commentPagingRequired'><br /> <span class='paging-control-container'><br /> <a expr:class='data:post.oldLinkClass' expr:href='data:post.oldestLinkUrl'><br /> <data:post.oldestLinkText/><br /> </a><br /> <a expr:class='data:post.oldLinkClass' expr:href='data:post.olderLinkUrl'><br /> <data:post.olderLinkText/><br /> </a><br />  <br /> <data:post.commentRangeText/><br />  <br /> <a expr:class='data:post.newLinkClass' expr:href='data:post.newerLinkUrl'><br /> <data:post.newerLinkText/><br /> </a><br /> <a expr:class='data:post.newLinkClass' expr:href='data:post.newestLinkUrl'><br /> <data:post.newestLinkText/><br /> </a><br /> </span><br /> </b:if><br /> <br /> <p class='comment-footer'> <b:if cond='data:post.embedCommentForm'><br /> <b:if cond='data:post.allowNewComments'><br /> <b:include data='post' name='comment-form'/><br /> <b:else/><br /> <data:post.noNewCommentsText/><br /> </b:if><br /> <b:else/><br /> <b:if cond='data:post.allowComments'><br /> <a expr:href='data:post.addCommentUrl' expr:onclick='data:post.addCommentOnclick'><data:postCommentMsg/></a><br /> </b:if><br /> </b:if><br /> <br /> </p>

  7. Add your feed link and name it as you like
As shown above Replace the highlighted link with you Blog's feed link, if you don't know what it is? Just add http://yourblog.blogspot.com/feeds/posts/default if you're on Blogspot


After this your blog should be free from Haloscan! Cheers!
Things to remember:
  • If finding from the Firefox Ctrl+F, The Part 1 comes 1st then will come Part 3rd and last comes Part 2nd, Don't get distracted by the irregular placement.
  • The Part 1 is the Code for the Comment link which appear on the homepage or at the end of every post.
  • Part 2 is the code for the Main comment system, it appear below every post where Commenter writes comment, choose account and post them.
  • Part 3 is for the Comment feed, It's doesn't make any difference but it's the link at the bottom of every page, showing the link to subscribe to your blog's feed.

You're Done? or any problem, I'ld like to hear your words, Please comment.

UPDATE: Many of you are sad, since you lost your comments. By the way, exporting comments is possible apparently it has got a very little chance that you'll succeed and it's hard to do. Download the python script from here, it will get all of your comments on the hard drive. Now you have to make scripts that would post comments on your blog. The problem is that while you are exporting your comments (and you have lots & lots of them, more than 100) haloscan CAN and WILL block you identifying you as a bot flooding their servers with many requests. Hence, it is not possible. Also, if you are very very desperate to get comments back, try this.

Wednesday, 13 May 2009

Google search feature Guide

Google, A leading search engine that we use every day to search content on internet. but google.com is not only for searching web pages from web. Google.com has many amazing features to help you to find exactly what you're looking for. but Some of the most useful features that you can in your daily life. like check the who link with you or mathematical calculation . Here I tell you more then 11 Great Hidden Secrete Google Can Do That You Should Know and use in your daily life .

1.Package Tracking : You can track packages by typing the tracking number for your UPS, Fedex or USPS package directly into the search box. We’ll return results that include quick links to easily track the status of your shipment.
Google-tricksGoogle-tricks-4 2. phonebook : With Google search you can Search the phone number of your clients , friends and even college friend .The phone book operator can be used to find both the official and residential phone numbers of people. Three operators can be used for the phonebook search: rphonebook, bphonebook and phonebook, which will search residential listings, business listings, or both, respectively.
A query such as:
phonebook:ABC def ny
would list both business and residential listings for abc def in New York. but if you concerned about your privacy and  your address information being in Google's databases for the world to see . so, don’t worry Google give you right to delete your address information from Google's databases , just Fill out the form at and your information will be removed, usually within 48 hours.

2. Earthquakes : To see information about recent earthquakes in a specific area type "earthquake" followed by the city and state or U.S. zip code. For recent earthquake activity around the world simply type "earthquake" in the search box. Google tell the latest news and report about recent earthquakes activity around the world .
Great-Hidden-Things-Google-

3. Spell Checker : Google’s spell checking software automatically checks whether your query uses the most common spelling of a given word. If it thinks you’re likely to generate better results with an alternative spelling, it will ask “Did you mean: (more common spelling)?”. Click the suggested spelling to launch a Google search for that term.
Google-tricks-1

4. Local Search : If you’re looking for a store, restaurant, or other local business you can search for the category of business and the location and we’ll return results right on the page, along with a map, reviews, and contact information.
Google-tricks-2
5. Real Estate and Housing : To see home listings in a given area type "housing", "home", or "real estate" and the name of a city or a U.S. zip code into the Google search box and hit the Enter key or click the Google Search button. Clicking the "Go" button on the results page will display details of individual homes that Google has indexed.
Google-tricks-3

6. Area Code : To see the geographical location for any U.S. telephone area code, just type the three-digit area code into the Google search box and hit the Enter key or click the Google Search button.
Google-tricks-5
7. The OR operator : Google's default behavior is to consider all the words in a search. If you want to specifically allow either one of several words, you can use the OR operator. For example, [ San Francisco Giants 2004 OR 2005 ] will give you results about either one of these years, whereas [ San Francisco Giants 2004 2005 ] (without the OR) will show pages that include both years on the same page. The symbol | can be substituted for OR. (The AND operator, by the way, is the default, so it is not needed.)

8. Use the Plus (+) and Minus (-) Signs. : The plus sign just before a search term means "This MUST be found in the search". Conversely, if you find a lot of search results that include a specific product, word, phrase, or item that you do not want to see, you can put a minus sign before that word or phrase, and those results will be excluded from your search. You can even exclude domains or top-level domains from your search - see the site: command below.

9. Use the Asterisk (*) As a WildCard search term.  : you can insert an asterisk in your search phrase and it will act as a wild card matching any word in that place in the phrase. Not only that, but you can insert more than one asterisk in place of more than one word in your search phrase, up to the limit of ten search words - and the wild card markers are not counted toward this ten word limit.

10. filetype :  This is my favorite operator. Using this, you can search for a specific file type in the internet. Suppose you want to search for a document for linux and you only desire PDF file types. The query you should enter into Google is as follows:
filetype:pdf linux
If you want to search for mp3 music to download, type filetype:mp3 and the artist name followed by that. This search will fetch you any such mp3 file in the pages which Google has crawled.

Actually there are many many many more awesome google search features besides these features but they were the least known.
Some useful links:
Google search basics: More search help
Learn how using some characters can improve the quality of the Search results

Google Search Feature
Some ways to lure out the most common things from google

Google Advanced search
Don't want to remember these tips? Okay! Google has a solution, Google Advanced search.

Improve your Google Search

The Basic search help article covers all the most common issues, but sometimes you need a little bit more power. This document will highlight the more advanced features of Google Web Search. Have in mind though that even very advanced searchers, such as the members of the search group at Google, use these features less than 5% of the time. Basic simple search is often enough. As always, we use square brackets [ ] to denote queries, so [ to be or not to be ] is an example of a query; [ to be ] or [ not to be ] are two examples of queries.
  • Phrase search ("")
    By putting double quotes around a set of words, you are telling Google to consider the exact words in that exact order without any change. Google already uses the order and the fact that the words are together as a very strong signal and will stray from it only for a good reason, so quotes are usually unnecessary. By insisting on phrase search you might be missing good results accidentally. For example, a search for [ "Alexander Bell" ] (with quotes) will miss the pages that refer to Alexander G. Bell.
  • Search within a specific website (site:)
    Google allows you to specify that your search results must come from a given website. For example, the query [ iraq site:nytimes.com ] will return pages about Iraq but only from nytimes.com. The simpler queries [ iraq nytimes.com ] or [ iraq New York Times ] will usually be just as good, though they might return results from other sites that mention the New York Times. You can also specify a whole class of sites, for example [ iraq site:.gov ] will return results only from a .gov domain and [ iraq site:.iq ] will return results only from Iraqi sites.
  • Terms you want to exclude (-)
    Attaching a minus sign immediately before a word indicates that you do not want pages that contain this word to appear in your results. The minus sign should appear immediately before the word and should be preceded with a space. For example, in the query [ anti-virus software ], the minus sign is used as a hyphen and will not be interpreted as an exclusion symbol; whereas the query [ anti-virus -software ] will search for the words 'anti-virus' but exclude references to software. You can exclude as many words as you want by using the - sign in front of all of them, for example [ jaguar -cars -football -os ]. The - sign can be used to exclude more than just words. For example, place a hyphen before the 'site:' operator (without a space) to exclude a specific site from your search results.
  • Fill in the blanks (*)
    The *, or wildcard, is a little-known feature that can be very powerful. If you include * within a query, it tells Google to try to treat the star as a placeholder for any unknown term(s) and then find the best matches. For example, the search [ Google * ] will give you results about many of Google's products (go to next page and next page -- we have many products). The query [ Obama voted * on the * bill ] will give you stories about different votes on different bills. Note that the * operator works only on whole words, not parts of words.
  • Search exactly as is (+)
    Google employs synonyms automatically, so that it finds pages that mention, for example, childcare for the query [ child care ] (with a space), or California history for the query [ ca history ]. But sometimes Google helps out a little too much and gives you a synonym when you don't really want it. By attaching a + immediately before a word (remember, don't add a space after the +), you are telling Google to match that word precisely as you typed it. Putting double quotes around the word will do the same thing.
  • The OR operator
    Google's default behavior is to consider all the words in a search. If you want to specifically allow either one of several words, you can use the OR operator (note that you have to type 'OR' in ALL CAPS). For example, [ San Francisco Giants 2004 OR 2005 ] will give you results about either one of these years, whereas [ San Francisco Giants 2004 2005 ] (without the OR) will show pages that include both years on the same page. The symbol | can be substituted for OR. (The AND operator, by the way, is the default, so it is not needed.)

Exceptions

Search is rarely absolute. Search engines use a variety of techniques to imitate how people think and to approximate their behavior. As a result, most rules have exceptions. For example, the query [ for better or for worse ] will not be interpreted by Google as an OR query, but as a phrase that matches a (very popular) comic strip. Google will show calculator results for the query [ 34 * 87 ] rather than use the 'Fill in the blanks' operator. Both cases follow the obvious intent of the query. Here is a list of exceptions to some of the rules and guidelines that were mentioned in this and the Basic Search Help article:

Exceptions to 'Every word matters'

  • Words that are commonly used, like 'the,' 'a,' and 'for,' are usually ignored (these are called stop words). But there are even exceptions to this exception. The search [ the who ] likely refers to the band; the query [ who ] probably refers to the World Health Organization -- Google will not ignore the word 'the' in the first query.
  • Synonyms might replace some words in your original query. (Adding + before a word disables synonyms.)
  • A particular word might not appear on a page in your results if there is sufficient other evidence that the page is relevant. The evidence might come from language analysis that Google has done or many other sources. For example, the query [ overhead view of the bellagio pool ] will give you nice overhead pictures from pages that do not include the word 'overhead.'

Punctuation that is not ignored

  • Punctuation in popular terms that have particular meanings, like [ C++ ] or [ C# ] (both are names of programming languages), are not ignored.
  • The dollar sign ($) is used to indicate prices. [ nikon 400 ] and [ nikon $400 ] will give different results.
  • The hyphen - is sometimes used as a signal that the two words around it are very strongly connected. (Unless there is no space after the - and a space before it, in which case it is a negative sign.)
  • The underscore symbol _ is not ignored when it connects two words, e.g. [ quick_sort ].

Sperse.com Meta Search Engine

People usually tend to stick to the search engines they like, but there are often times when your search engine doesn’t give you required results and you turn to others. A meta search engine is one that searches multiple engines like Google, Yahoo e.t.c. and shows you aggregated results. One such smart and accurate meta search engine is Sperse.
accurate search engine
Sperse searches multiple engines and remove duplicate results in order to provide the user with more accurate and relevant results. In addition to the traditional web pages, Sperse also allows you to search images, news, music, video and much more. One of the coolest features that Sperse offers is the ability to preview the webpage directly from the search results.
smart search engine
Main features of Sperse:
  • Smart meta search engine that combines results from Google, Yahoo! and Ask.
  • Filters out duplicate results for better accuracy and relevancy.
  • Search the web, images, videos, music and even local listings.
  • A real-time thumbnail preview accompanies each search result.
  • Narrow your search by location using zip codes.
  • Type a question and get an answer using Yahoo! answers.
Check out Sperse @ www.sperse.com

Sunday, 10 May 2009

Multi process Support in Firefox

Firefox, the world's second most used browser, by the looks of it will soon receive an update that will add multi-process support.

By multi-process support we re talking about the similar feature seen in Google Chrome and IE8 that runs multiple, separate processes for each tab, which allows the browser to function without issues even when one tab has stopped responding or has crashed. This method of splitting processes increases stability and offers performance improvements as well.
As for why the speculation regarding multiprocessor support arose, that is because of a recent project that the Mozilla has initiated. The project is being co-coordinated by Benjamin Smedberg, who is a long time supporter of Mozilla. While little is known abut the project itself, we have a roadmap which suggests that we should be seeing a simple implementation of this in action by July this year.

That being the first phase, there will be three other phases post this, which will deal with the interactions between process types. The third phase will comprehensively test APIs for extensibility, accessibility, and performance. The fourth phase will deal with the final implementation and sandboxing. 

Looking at how things are moving now, it would be at least an year from now when we would see a final release version of Firefox with multi process support.

Friday, 8 May 2009

Dual Boot Windows 7 with vista

If you're dying to try out Windows 7 but aren't ready to give up your installation of XP or Vista, let's take a look at how to dual boot Windows 7 with XP or Vista.

Step 0: Download the Windows 7 Beta and Burn It to a DVD

 
Assuming you've already downloaded a fresh copy of Windows 7, you'll need to burn it to a DVD in order to do a fresh installation. To handle this task, grab a copy of the most popular CD and DVD burning tool ImgBurn, burn the ISO to a DVD, and move right along to step 1.

Step 1: Partition Your Hard Drive

Before you go installing Windows 7, the first thing you need to do is create a new partition on your hard drive to hold the new installation of Windows. Partitioning your hard drive will vary depending on whether you're running XP or Vista—namely because Vista has a partition tool baked in, XP does not.

Partition Your Hard Drive in XP

To partition your hard drive in Windows XP, you'll need to download some sort of third-party partitioning software. There are a lot of options available, but I prefer to stick with the previously mentioned GParted live CD, a free, open source boot CD that can handle all kinds of partitioning duties.
To use it, just download the GParted Live CD, burn it to a CD, then reboot your computer (booting from the disc). You'll boot right into the partitioning tool. HowtoForge's previous guide to modifying partitions with GParted is a great place to start, but it's a fairly basic procedure:
  1. Resize your current OS drive to free up enough space for a Windows 7 partition (the minimum system requirements ask for 16GB).
  2. Create a new partition from the newly freed space.
  3. Apply your changes.

Partition Your Hard Drive in Vista

The folks at Redmond were kind enough to include a disk partitioning tool in Vista if you know where to look. So go to Control Panel -> System and Maintainence (skip this one if you're in Classic view) -> Administrative Tools -> Computer Management. Once you launch the Computer Management tool, click on Disk Management under the Storage heading in the sidebar. It's partitioning time.

 
Luckily we've already gone down this road before in step-by-step detail, complete with pictures, so check out our previous guide to creating a new partition in Vista. In a nutshell, you'll need to shrink your current OS partition to free up at least 16GB of disk space (per the Windows 7 minimum system requirements), then create a "New Simple Volume" from the free space.

Step 2: Install Windows 7

Now that you've done all the heavy lifting, it's time for the easy part: Installing Windows 7 on your new partition. So insert your Windows 7 disc and reboot your computer (you'll need to have enabled booting from your DVD drive in your system BIOS, but most PCs will have this enabled by default).


Once the DVD boots up it's a simple matter of following along with the fairly simple installation wizard. When you're choosing installation type, be sure to select Custom (advanced) and choose the partition you set up above. (Be careful here. Choosing the wrong partition could mean wiping your other Windows installation altogether, so make sure you pick the new partition you just created.)
After you select the partition, go grab yourself a drink and let the installer do its work. Windows will run through some installation bits, restart a few times in the process. Eventually you'll be prompted to set up your account, enter your license key, and set up Windows. Keep your eyes open for fun new Windows 7 features, like your new homegroup (and the accompanying password). When it's finished, you're up and rolling with your new Windows 7 installation.

 
Congratulations! You should now have a new entry for Windows 7 on your boot screen when you first start up your computer. You've now got all the tools necessary to dual-boot Windows 7 and XP or Vista—or even to triple-boot Windows 7, Vista, and XP.
This isn't the only way to set up a multi-boot system by any means, but it's how I pulled it off. If you've got a method of your own that you prefer, let's hear it in the comments.

Invisibily Cloak: Not too far


Scientists say they are a step closer to developing materials that will render people and other objects invisible.
Researchers say they can redirect light around 3D objects using metamaterials--artificially engineered structures created at a nano scale that contain optical properties not found in nature, according to an Associated Press report.
People see objects as a result of the light reflecting or scattering off them. This new mixture of materials has "negative refractive" properties that keep light from being absorbed or reflected by the object, allowing only the light from behind the object to be seen. Essentially, the material bends visible light in a way that eliminates the creation of reflections or shadows in much the way water flows around a stone.
The findings, to be released later this week in Nature and Science, were made by scientists at the University of California, Berkeley, led by Xiang Zhang. The research, which was funded in part by the U.S. Army Research Office and the National Science Foundation's Nano-Scale Science and Engineering Center, could have broad applications, including for the military.
But the materials work in limited wavelengths, so they won't be used to hide buildings from satellites, said Jason Valentine, who is a co-author of one of the papers.

"We are not actually cloaking anything," Valentine told Reuters. While the Harry Potter series of books and films has made the idea of a personal "invisibility cloak" popular, he says, "I don't think we have to worry about invisible people walking around any time soon. To be honest, we are just at the beginning of doing anything like that."

Web streaming from Torrent


Online BitTorrent client BitLet has released a new service that lets users stream MP3 and Ogg encoded music directly from torrent files. The new music feature, called westeam, works by prioritizing bits at the beginning of each track -- and then subsequent to the one you just listened to, but also gives preference to rare bits to achieve optimal speeds. WeStream is a Java applet that works in any browser that support Java.
Westream's interface is simple, with controls for volume and playback. Like any BitTorrent client, it also seeds the file for as long as you keep the browser window open (click on the download speed link to see the speed at which you're uploading). "It would have been easy to design the streaming client to be extremely selfish, and make it care only for its needs," wrote westream's creators in a blog post. "Ideally, we tried to avoid it: westream should behave as most torrent clients, with a slightly different piece choosing strategy."


In my testing, westream worked perfectly with nary a hiccup. I was able to quickly stream any track, start to finish (I picked a torrent with an ample amount of seeders from Legit Torrents for my tests). Of course, the quality of audio and level of gaplessness you experience will be totally dependent on the health of the torrent you're trying to stream.
The volume control seemed a bit wonky (going from very soft to very, very loud without much in between) and it would be nice to have the option to download the torrent straight away if you like what you're hearing. But in general, westream performs very well.
Westream is a useful BitTorrent innovation that lets users essentially "try before they buy." Presumably, the same idea can be applied to video -- imagine: streaming video distribution over BitTorrent. Very cool.

Wednesday, 6 May 2009

Ubuntu 9.04 Jaunty Jackalope


The name's ridiculous, but "Jaunty Jackalope," the next release of the popular Linux distribution Ubuntu, is seriously focused on the user experience. Dig what's new and improved in the beta of Ubuntu 9.04, released today.

One feature I couldn't show in the screenshots was the improved boot time in Jaunty. Having lived in it for about a week and installed a few apps, it took 24.9 seconds from choosing my OS to boot in Grub to a login window, and about 19 seconds more to get to a fully-loaded desktop (about 43 total).
What's below are screenshots taken from the last alpha version before it. If Jaunty's release schedule holds (and it almost always does), a final release is just a month off. Ubuntu's beta releases are usually pretty close to the final thing, though, and it's easy enough to download an ISO file, then live-boot and test it without harm using UNetbootin from Windows or Linux.
Yada yada technical geekery. Here's how Ubuntu 9.04 looks and works different from before; click on a thumbnail for a bigger view and description:


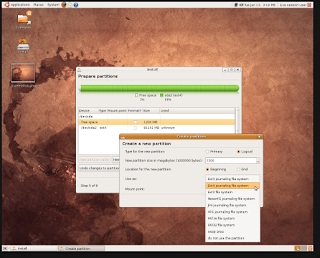
The new notification system is a solid step forward, even if their app-to-app consistency was a little shaky in the alpha. Taking an obvious cue from the unobtrusive <a href="http://growl.info/">Growl</a> OS X notifications, nearly everything with ambient informationтАФscreen brightness, volume levels, Wi-Fi connections, IM, GNOME-Do announcersтАФfades in and drops out from the upper-right corner. Small things can make a big differenceтАФlike adding an installation option that clearly tells a Windows user what happens after they let Ubuntu put itself in some empty hard drive space. It's not the default, but you can partition and install Ubuntu 9.04 with <a href="http://en.wikipedia.org/wiki/Ext4">ext4</a>, a faster, more advanced format.If you're installing 9.04 over or alongside a system running Windows Vista or even the Windows 7 beta, it can pick up documents, settings, and Firefox profiles before it moves in. On most modern monitors that can report their details, Ubuntu will automatically adjust fonts and rendering to provide a clear look. On my laptop monitor set to a 1680x1050 resolution, for instance, Ubuntu bumped up the font size a little and auto-selected the LCD smoothing option. The core Linux components all get an upgrade, including the GNOME desktop (which includes native Exchange support in the Evolution manager), GIMP, OpenOffice.org (finally moving up to 3.0), Compiz, the Brasero burning tool, and lots more.
By default, Ubuntu now puts a 60-second delay on most session actions you initiateтАФshutdown, restart, or log out, reallyтАФto safeguard against oops-no-wait-too-late moments. The Computer Janitor tool that didn't quite make it into the last release makes a (tentative) appearance in 9.04 ... And we kinda wish it had stuck on the drawing board, given how it really didn't like trying to clean up a system I'd just installed just earlier that week, with perhaps one unofficial Python script running.

For a thoroughly detailed screenshot tour of the KDE and Xfce-based variants of Ubuntu 9.04, Kubuntu and Xubuntu, check out Softpedia's review of Ubuntu 9.04 Alpha 6.
What are you liking about the Jaunty Jackalope? What's still on your must-have list before a Linux switch makes sense? Tell us everything in the comments.

Tuesday, 5 May 2009

8 tricks for Super search

Nobody "surfs" the Web anymore. Some 80 percent of all online sessions now begin with a search. Google proves the point by making over a billion dollars every quarter on search ads. Nobody ever made than kind of money selling browsers.

But plain old Web searching doesn't do the trick anymore. Most Web searches either yield too much random data, or they don't give you what you need when you need it.
If you're an efficient searcher, you know to hit the Web running. Here are some tricks that will help you get what you want when you want it—sometimes before you ask for it.
1. Go on the alert. Why search day after day for news about the next release of your favorite game? At Google Alerts you can tell Google to send you a daily, weekly, or up-to-the-minute e-mail that >sums everything up.
2. Alert Yahoo, too. Yahoo alerts don't offer Google's level of detail, but the menu-oriented interface gives novices a clear idea of what options are available in the alerts that they create. On the other hand, Yahoo makes you sign in before you can create an alert, a task that could easily sidetrack distractable users.
3. Know an operator or two. You can create tightly defined searches for your alerts if you use search operators when defining your alert. For example, if you want to search only PCMag.com, append the operator site:pcmag.com to your search query. If you really want to geek out on all the search possibilities, peruse Google's and Yahoo's lists of search modifiers.
4. Live a little. Microsoft Live Search macros are easy to overlook. Live Search macros let you build and save frequent searches—for example, if you're new to the Linux OS distribution Ubuntu and search the forums a lot, you can build a search (or use the already available macro) that includes those sites. When you're ready to search, just plug in what you're looking for and the search will automatically be limited to the sites you specified.

The macros are buried in the More menu at the right end of the main Live Search screen, and they can be really helpful. Go to the bottom of the More menu and choose See All. You'll see two headings that refer to Macros: Edit Macros and Find Macros. The Find Macros menu lets you browse macros other people have created, while Edit Macros is your choice for creating menus yourself.

5. Take a shortcut. Firefox launches a search when you right-click selected text and choose Search in Google from the shortcut menu. See "Firefox 3: 8 Things You Didn't Know You Could Do" to learn how to get zippier performance from Firefox).

6. Get personal. Vanity surfing isn't just an exercise in ego building. If you have a reputation to protect for any reason, you need to know what people can find out about you. Consider Google's Profiles service, which allows you to set up a personal page in which you describe yourself to the world of Google searchers (you know, everybody) on a page that gets priority in Google search results. Google profiles don't erase any nasty comments others may have made about you on the Web, but they do give you equal time to make your case.
When you're looking for personal information about other people, Web searches are often too general, but if you go to www.pipl.com, you can find a slightly scary level of detailed personal information about yourself or anyone else. The information you find on Pipl is frequently much more detailed than what you'll get from Google. Even if you don't like bad news, it's usually better if you find the dirt on yourself before someone else does.

7. Troll Twitter for timely tips. Despite its reputation for disseminating drivel, Twitter is probably your best source for fresh, time-sensitive information, and an essential resource for ensuring that you're dealing with current information. It also delivers information of a different nature—search engines tell you what a machine thinks you're looking for, but a Twitter search tells you what other people are choosing to say about that topic right now. The mainstream search engines also conflate today's information with stuff that's been hanging around for years, while Twitter searches skew toward recent relevance. Twitter's plain old search box can deliver a mother lode of information about what's on the world's collective unconscious right this minute, as can the search tools in the most popular third-party services like Twitscoop and Twitterfall. You can also ferret out current trends through the search tools built into many of the free, downloadable helper applications for Twitter, including Tweetdeck, Seesmic Desktop, and AlertThingy.

8. Tailor responses. The Internet makes more wrong information available to more people than ever before. Google now invites you to promote items from your search results (that is, move them up in the search ranking), or remove them altogether, by clicking the gray icons next to each returned link. As you repeat this action in different searches, Google's software learns to deliver results that are more reliable for you—more in line with what you tend to look for. So, for example, you might get recipes when you search on "chicken," while Farmer Pete gets items about the care and feeding of laying hens. In addition, Google now tries to deliver "personalized" results by taking into account what you've clicked on in the past, so your own past search habits could affect the results you get as well.

If you can't have Web search results injected directly into your brain, that's only because Google's engineers haven't yet figured out how to push advertising up there, too. The minute they do, you'll know.

Firefox stuff, you didn't knew about!

The latest version of Mozilla's popular open-source browser enjoyed one of the most successful launches in software history, with a record-setting 8.2 million downloads the first day it was available. With the ability to drastically expand the browser's functions using plug-in extensions and Greasemonkey scripts, many of Firefox 3's built-in features are overlooked. Here are eight handy things you can do with Firefox, ranging from tiny tweaks to hugely powerful capabilities, all with nary an extension to install.

1. Duplicate tabs with drag-and-drop.
Duplicating tabs is a piece of cake: Simply hold the Ctrl key while dragging the tab you want to duplicate to an empty space on the tab bar. 2. Minimize the toolbar.
Free up a little extra screen real estate by getting rid of the big, round "Back" button and replacing it with a more streamlined control. Right-click the toolbar, choose Customize, and select Use small icons. The new controls are perfectly functional but smaller, allowing the toolbar to shrink and leaving more room for viewing sites.
3. Use smart bookmarks.

Use smart bookmarks
Smart bookmarks are live bookmarks that don't just refer to particular sites but actually generate live lists of sites according to parameters you define. For example, you might have a smart bookmark that lists the 10 sites you visit most often, or the last 20 sites you've visited with a particular keyword in their title. To create a smart bookmark, select Organize Bookmarks from Firefox's Bookmarks menu. In the window that opens, select Bookmarks Menu in the left-hand pane, then click Organize in the toolbar at the top and New Bookmark in the drop-down menu. Give your smart bookmark a descriptive name, such as "10 Most Recent Bookmarks." In the Location field, you're going to enter in a line of code telling the smart bookmark what to do. For the 10 sites you bookmarked most recently, you'd enter: place:queryType=1&sort=12&maxResults=10 . There are dozens of parameters you can use; Mozilla's developer site includes a list of commands you can use in smart bookmarks. Here are a couple of the most useful:
  • The 10 sites you've visited most recently (some installations of Firefox come with this smart bookmark already in place on the Bookmarks toolbar): place:queryType=0&sort=8&maxResults=10
  • The 10 most visited sites with some search term in them: place:queryType=0&sort=8&maxResults=10&terms=keyword (replace "keyword" with your desired term)
4. Send e-mail via Yahoo! Mail or Gmail by default.

Send e-mail via Yahoo! Mail or Gmail by default.
Normally, clicking on an e-mail address on a Web page will open up a new e-mail using your default e-mail program. If you'd rather use Yahoo! Mail, open up Options under Firefox's Tools menu, select the Applications tab, and scroll down to the mailto: entry. Select Use Yahoo! Mail and click OK. Gmail is not included as a built-in option in every installation of Firefox, but if yours doesn't have it, you can add Gmail easily enough. Skip the Options dialogs for now and instead type about:config in Firefox's address bar and hit Enter. In the Filter field, type gecko.handlerServiceAllowRegisterFromDifferentHost. Actually, you can simply type gecko and find the entry in the filtered list. Double-click the gecko.handlerServiceAllowRegisterFromDifferentHost entry to change it to True.
Next, cut-and-paste this line into the address bar and hit Enter: javascript:window.navigator.registerProtocolHandler("mailto", "https://mail.google.com/mail/?extsrc=mailto&url=%s","Gmail")
A message will appear at the top of the browser window asking if you want to add Gmail as an application. Now, repeat the process above for choosing Yahoo! Mail, but select the new Use Gmail option instead.

5. Change or remove the Close tab buttons.

Change or remove the Close tab buttons.

By default, Firefox 3 puts an X on each tab, similar to the X button that closes an application. You can remove this button, or see it only on the tab you're currently viewing. Open about:config again and enter browser.tabs.closeButtons in the Filter field. Enter one of the following values depending on the behavior you prefer:
  • 0 (Zero) Close button only on the active tab.
  • 1 (Default) Close buttons on every tab.
  • 2 No close buttons.
  • 3 Single close button at the end of the tab bar, instead of on the tabs themselves.
6. Change the behavior of the Awesome Bar.
Mozilla has dubbed Firefox 3's address bar the "Awesome Bar" because of the useful suggestions it makes as you type. By default, the Awesome Bar bases its recommendations on your recent history, pages you've tagged, and your bookmarks. You can change the way the Awesome Bar acts in the configuration page. Open about:config and change the following values, depending on the features you want:
  • To disable the Awesome Bar entirely and revert to Firefox 2–like functionality, change the value of browser.urlbar.maxRichResults to -1.
  • To allow the Awesome Bar to recommend only sites whose address you've typed directly into the address bar, change browser.urlbar.matchonlytyped to TRUE.
  • To remove unvisited bookmarks from the pool of recommendations, change places.frecency.unvisitedBookmarkBonus to 0 (zero).
  • To remove all bookmarks from the Awesome Bar, change both places.frecency.unvisitedBookmarkBonus and places.frecency.bookmarkVisitBonus to 0 (zero).
7. Search any site from the address bar with smart keywords.

Search any site from the address bar with smart keywords

The smart keyword function allows you to create searches for any site with a search engine, and trigger the search from the address bar using your choice of keyword. For example, you could create a smart keyword "me" to search the archives of your own site. If you wanted to see if you'd ever written about cat juggling, you'd type me cat juggling into the address bar and Firefox would return the results from your own site's search page. Visit the site you want to search and right-click its search box, selecting Add a keyword for this search. In the window that pops up, add a short description of the search and enter a short, memorable keyword that you'll use to trigger it. For example, to create a smart keyword for Space exploration, I visited the home page, right-clicked the search field, opened the smart keyword window, entitled my search Exploring space and then entered the keyword Space as my search keyword. Now, if I want to search for something—say, telescopes—I just type Space telescopes and the search is run.  
8. View your saved passwords for any page.
To view the passwords associated with any site, go to the log-in page and right-click anywhere on the page. Select View Page Info, and then the Security tab. Click View Saved Passwords. Another window will pop up showing the usernames associated with that site. Click Show Passwords to see the passwords for each username.
If you want to view all of your saved usernames and passwords, open Options under the Tools menu and select the Security tab. Click Saved Passwords to open a list of every site you've ever saved a password for. Again, click View Passwords and the list will display all of your passwords. You can't print this list, but you can just as easily take screenshots if you want to print out your passwords for safekeeping. Isn't this a huge security hole?, you may ask. Why yes, it is. Knowing how easy it is for anyone with access to your PC to view all your passwords, maybe you'd like to password-protect your passwords. In the Options | Security tab, click Use a master password and enter a password. Now this password will have to be entered any time you or anyone else tries to view saved passwords. You'll be asked to enter your master password every time you open Firefox; without it, Firefox won't automatically enter saved passwords for you. Make sure you don't forget this one!

Download a copy of Windows 7 RC now!

The Windows 7 Release Candidate (RC) is publicly available right now, so it's time to get your hands on a copy - which will work for you uninterrupted until next Spring. Don't get too excited though, as at nearly 2414MB, it's not a quick download.
So how do you get it? Well, like the beta, you'll need to register for a product key. But unlike the beta, the RC will work for most of a year from now, so you won't have to update straight away when Windows 7 is actually released sometime before January – most likely Autumn.
While Microsoft has confirmed the RC will not expire until 1 June 2010, it has cleverly ensured you'll need to sort out your installation before March. "Starting on March 1, 2010, your PC will begin shutting down every two hours," says Microsoft. "Windows will notify you two weeks before the bi-hourly shutdowns start. To avoid interruption, you'll need to install a non-expired version of Windows before March 1, 2010."
"[The RC is] a big deal for us," Microsoft's Windows OEM Product Manager Laurence Painell told TechRadar last week. "Obviously, we are releasing what we feel could be the final version - what we will put out to manufacturers and even wider availability when we release the product to consumers."
"Our official line is that [the production version] will be available no later than January 2010 and we will stick to that, but people will still be able to use the release candidate for nothing until June 2010."

What you need to think about
Beware that, like the beta, the RC is based on the Ultimate version of Windows 7, so if you invest in a netbook running the Starter Edition or another PC running Home Premium (or buy the boxed version), your version will have some features missing.


And remember also the sage advice – don't install the RC on a critical PC where you store all your main files and especially not if you haven't backed them up.
As with the beta version, you'll also need to burn an ISO file to make an installation DVD. Available in English, German, Japanese, Spanish and French as well as 64-bit and 32-bit versions, the OS requires a PC with these system requirements:
  • 1 GHz or faster 32-bit (x86) or 64-bit (x64) processor
  • 1 GB RAM (32-bit) / 2 GB RAM (64-bit)
  • 16 GB available disk space (32-bit) / 20 GB (64-bit)
  • DirectX 9 graphics processor with WDDM 1.0 or higher driver
If you have any technical questions about Windows 7, such as what partition size you'll need for dual-booting Windows 7 and Windows Vista, you may get the answer on TechNet's Windows 7 forums.
Microsoft hopes that the RC release will be as successful as the beta test. "There has been a great deal of feedback and a huge amount of it positive through the beta program," added Painell. "Obviously the beta program was the widest that we've ever run and the overwhelming response has been positive.
"We're obviously very excited internally about the quality of the product and that's been one of the overwhelming things internally."

11 Tips to enhance your online security

Many people think that installing anti-virus, firewall and anti-spyware software should inoculate them from all manner of threats.
The truth is, you need to be a bit more savvy than that.
Read on to find out 10 really easy ways to close the security holes that still remain on your PC.
And if you're called upon to clean the junk off a friend or relative's PC this Easter break, you might want to share this link with them to save you getting called back out again in a week.

1. Augment your anti-virus tool
Threatfire is designed to work alongside existing security products. Unlike traditional anti-virus tools, it doesn't rely on signatures to identify malware; instead, it monitors your PC for suspicious malware-like behaviour. The only time you'll hear from the program is when it's found something suspicious; otherwise it'll sit silently in the background.

2. Switch to plain text mail
HTML can be used to hide all sorts of unpleasant things in email. Set your mail program to view all messages as plain text by default - you should see an option for viewing individual messages as HTML when you trust the sender.

3. Don't click mail links
Never visit web sites by clicking links in your email unless you're 100 per cent sure the link is safe. This is especially true for emails purporting to come from financial institutions asking you to log in to verify your account details - 99.9% are scams (the other 0.1% are irresponsible).

4. Vet your email
Most anti-spam tools only process email that's been downloaded from your mail server - install PopTray and you can check and preview your mail while it's still on the server, deleting unwanted and suspicious messages without exposing them to your mail program.


5. Switch web browser
Upgrade to the latest version of Internet Explorer or switch to a browser that doesn't support potentially malicious Active-X controls such as Firefox, Opera or Google Chrome. Check the browser's privacy and security settings are set to Medium High or greater.

6. Check web sites before you visit
Install the free Web of Trust plug-in for Internet Explorer or Firefox (Chrome will be supported once the browser supports third-party add-ons), and you'll be in a better position to avoid unsafe web sites thanks to its traffic-light system for both sites and search engine results.

7. Manage your passwords
A password manager such as KeePass enables you to securely and easily enter your passwords into any program. As you only need to remember one master password to use the program, there's no excuse to use the same password across all your online accounts (the program will even generate secure, random passwords for you).


8. Screen all downloads
Never open attachments or downloads directly - save the file to your hard drive, right-click it and run a quick scan with your security tool of choice prior to opening it. When downloading files, make sure you download from a reputable web site (typically the program's own home page or a respected download site) – the WOT plug-in will help here.

9. P2P basics
Peer-to-peer networks are a breeding ground for malicious software, particularly in content that's been copyrighted. If you can't live without P2P, pick a trusted provider and client (such as uTorrent). Be careful what you share, and scan all downloads prior to opening them.

10. Create a virtual sandbox
Sandboxie enables you to run any program in a protected and isolated space on your hard drive. Changes made are discarded when you close the sandbox, so you can surf the web and open mail attachments without fear of malware sneaking on to your PC.

11. Move to linux
It's always better prevention than the cure, the best thing for your security would be to switch to an O/S which is completely harmless i.e. Linux, there are many linux distros available on the internet, I'd recommend ubuntu, it's a nice start on linux. You can try Dual-boot but it's not recommended for newbies.
If you want to try Linux you can do so without it touching your computer's file system at all. This is accomplished using virtualization which creates virtual computers on top of your existing operating system so you can install many different operating systems on one computer. Install Ubuntu over Windows through VirtualBox. The article is about Windows XP but it's just as same for other Window O/S also. If you want to try Linux you can do so without it touching your computer's file system at all.
I use VirtualBox. It is better & easier than Microsoft Virtual Machine or vmWare in my opinion. Go on, try it. It's just like installing normal software.

So what do you think? I'd like to hear your experiences!
Related Posts with Thumbnails